
By Sarah Prestbury – Senior Consultant
QuickSight is one of the leading BI (Business Intelligence) tools we partner with, due to the speed and affordability it allows in gaining insights into data. Our QuickSight blog series shows you how to leverage some of the built-in functionality of QuickSight. It will show you how to enhance your dashboards and make them interactive. In our last blog, we discovered the power of using actions with your dashboards to enhance the user experience. In this blog, we look at parameters, and one of the most common use cases where parameters can add value to your reporting: the date parameter, as well as how to use parameters to create dynamic titles.
QuickSight Parameters
What are parameters? Parameters help to add interactivity to your dashboards. They are named variables; their value is changed through controls and actions and is passed to a variety of things such as filters, calculated fields, titles and descriptions, custom visual content URLs, and more.
How to create a QuickSight parameter
To create a parameter, you need to be in the Analysis Layer.
- Open an analysis and you will find Parameters in the sidebar menu.
- Click on Parameters and click on the + sign on the top right.
- This will open the Create Parameter prompt. You will have to provide a parameter name, type, whether it is a single or multiple value, and the default value.
- It is important you choose the right parameter type: it cannot change once created. When associating a parameter with one Dataset Fields, ensure the type of the parameter matches the type of the field.
- Parameters are created to either take a single parameter value or multiple values.
- When setting the default value you can set a static default – which always remains constant -, or a dynamic default – which changes as your data updates (e.g., the average value of a field in your dataset).
Note that parameters will not do anything unless they are connected to something, so when you finish creating your parameter, QuickSight will prompt you with connecting your parameter to a filter, control, title or text field, calculated field, or custom action.
Date parameters
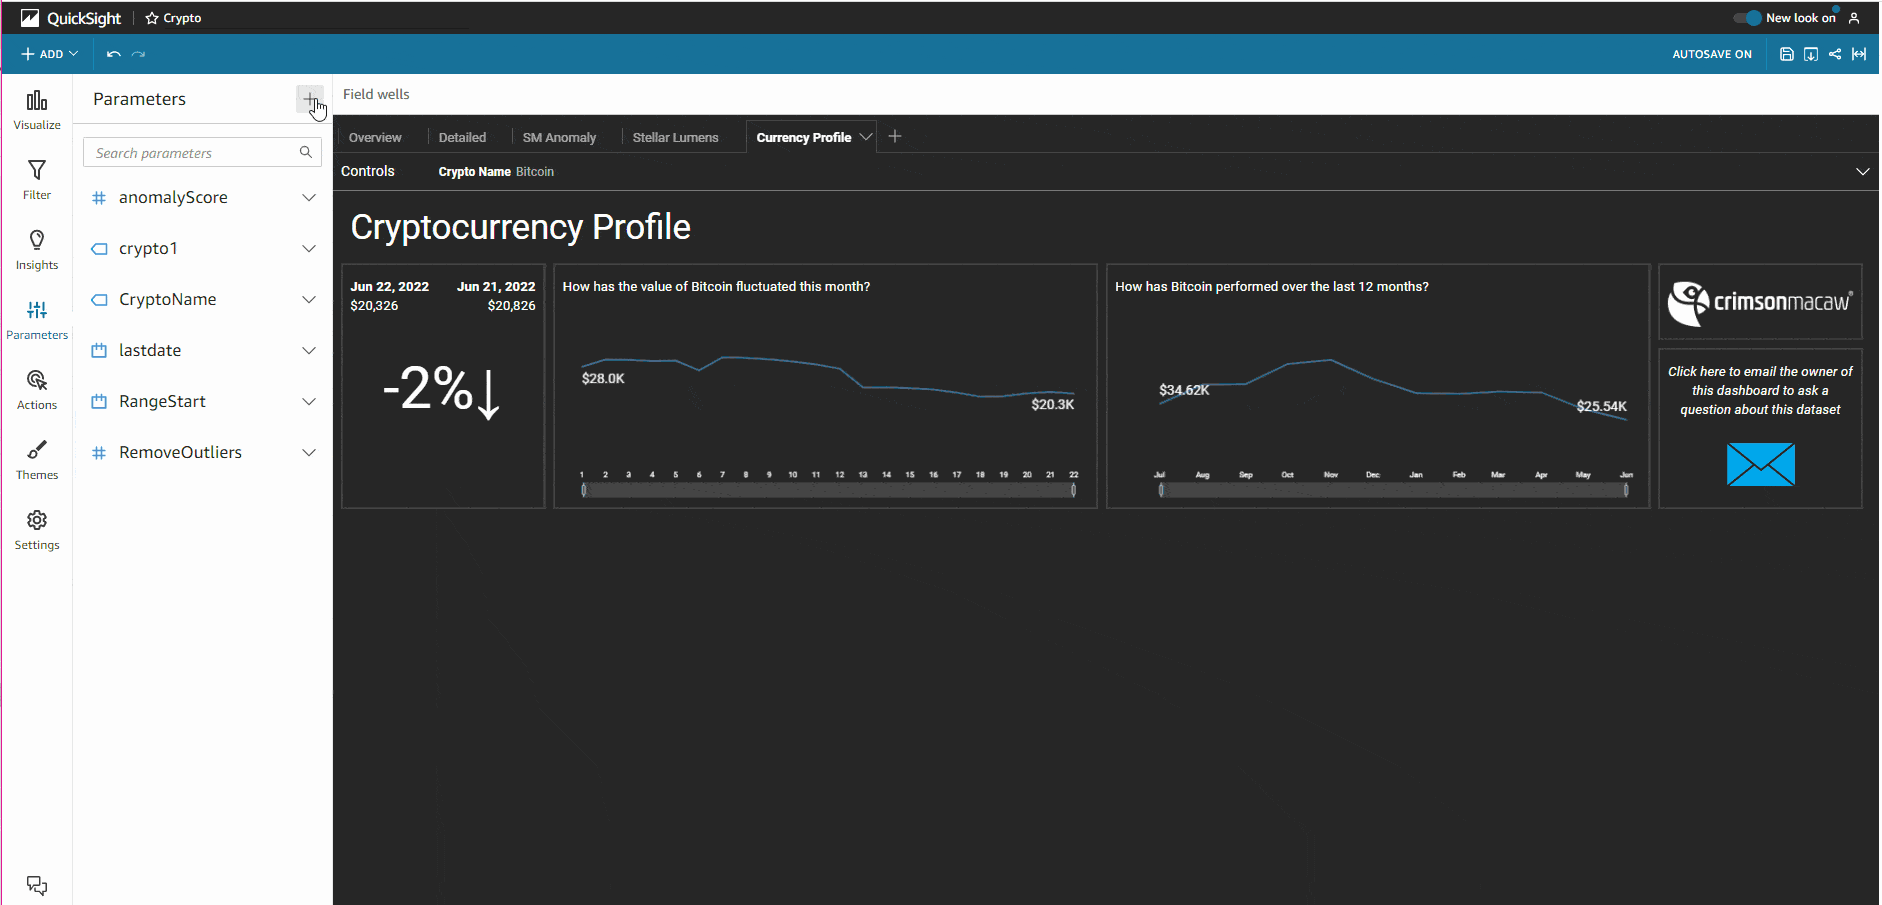
Parameters are used to create a single date control that can be used to filter visuals in the same report that might contain visuals with different date durations. E.g. a report that displays a KPI metric for today’s date, month to date, year to date, and a timeline of the previous 12 months, all on the same page. This is a common reporting requirement and a widely used solution here at synvert TCM. Without parameters, you would rely on having multiple date filter controls for each chart that displays a different date range. This can clutter the dashboard and impact user experience. To overcome this, you can easily create a DateTime parameter.
- Click ‘Create new parameter’
- Enter a name for your Parameter – we used ‘ReportingDate’ – note the name must not use spaces or special characters. You can change how it displays to users later
- Choose Data type: Datetime and Time granularity: Day
- Choose your default date – you can either hard code this to a selected date, use a relative date such as Today, or set a dynamic default. For this example, we are going to use a relative date of today
- To add the parameter control to the report so that users can interact with it, navigate to the Parameters menu, and use the arrow dropdown button next to the name of the date parameter you created. Select ‘Add control.’
- Here you can give the parameter a front-end name for users to make it more readable and choose the date format you wish to display.
Note: When a parameter control is added to a sheet, it will automatically pin the Controls section at the top. If you have multiple sheets in your report that you wish to show the data parameter, you will need to add the control to each sheet separately.
The reporting date parameter is now visible for users to select a date, but it is not yet actively driving anything in your report. The next step is to create a link between the parameter and date filters. In a previous blog post, we walked through using relative date filters. You can now use the date parameter you have created with a relative date filter.
- Click the filter pane
- Choose or create your date filter
- Select to set the date relative to the ‘Date and time from a parameter’ option.
- Choose your date parameter from the dropdown
This step creates an active link between the parameter and filter. Now when a user selects a date from the parameter control – the visuals with date filters linking to that parameter will update based on the user’s selection. You can create multiple relative date filters set to different numbers of days/ months/years that all link to the same date parameter. This allows you to create visuals with different date range combinations in the same report. It also provides the user with a single drop-down control to change the entire report to be relative to the date they select.
Dynamic Text with QuickSight Parameters
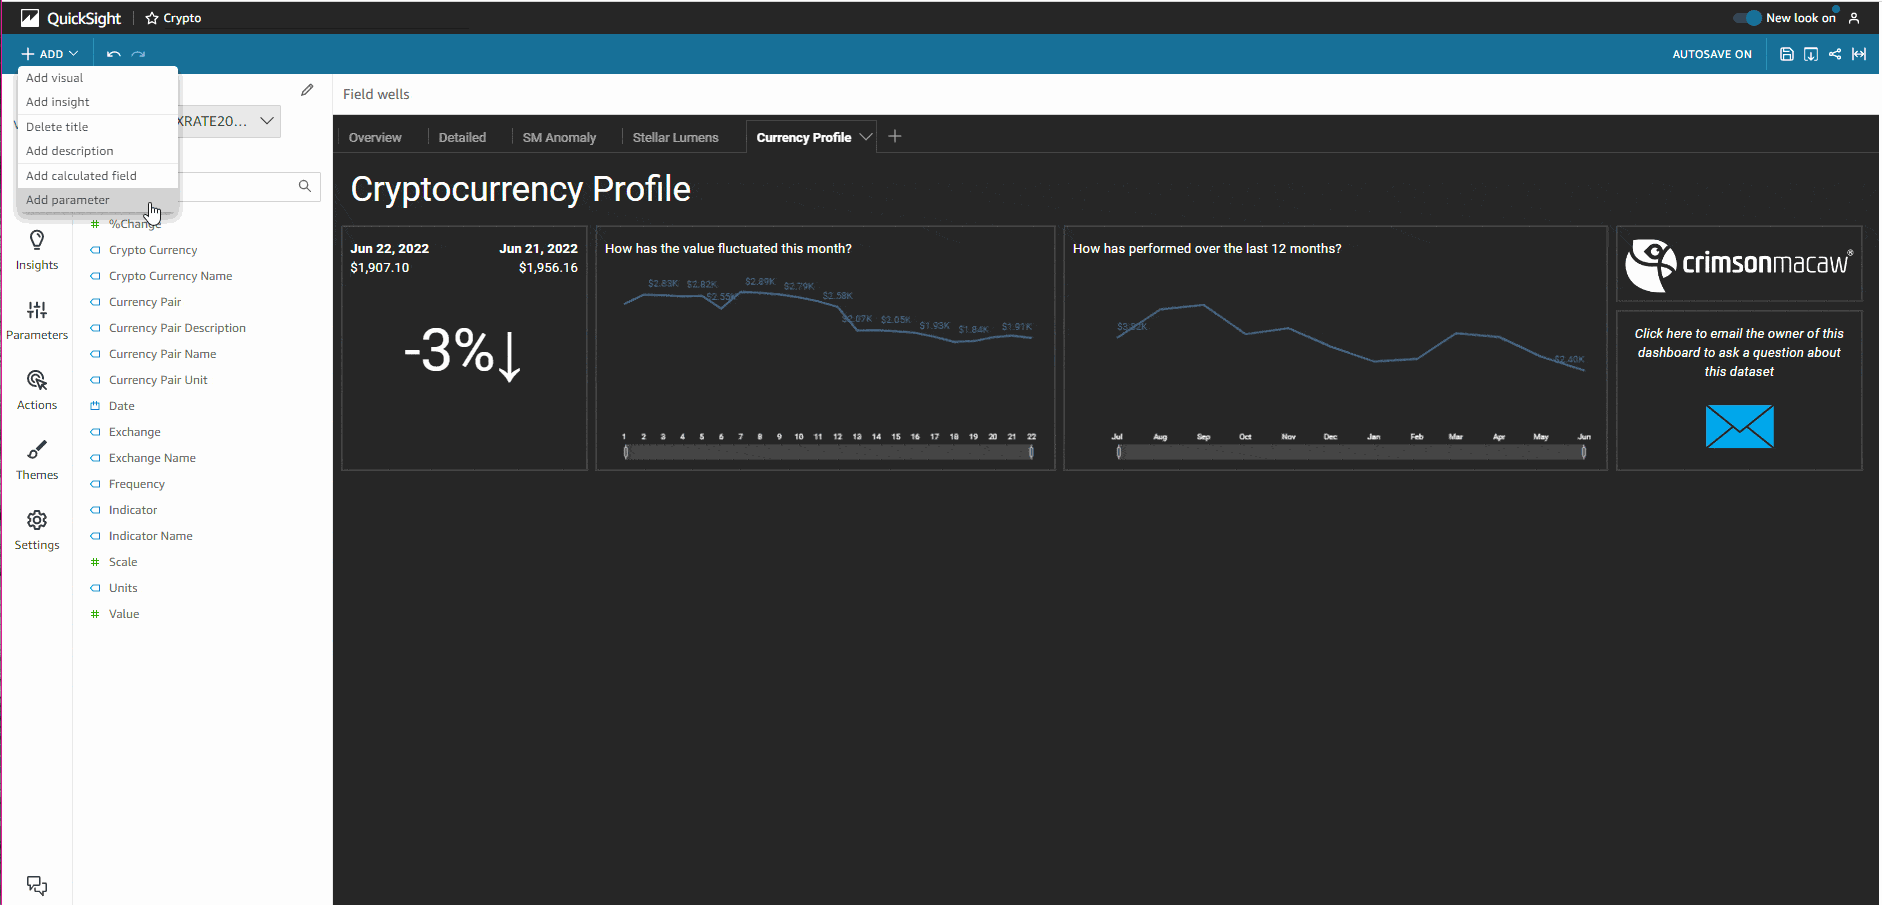
Another use case for parameters is creating dynamic text values that update based on a user selection. A good example is a visualisation title, that can react to a user’s filter selection. In this example we want the titles of our visualisation to update with the correct Cryptocurrency name. Names will be based on which Cryptocurrency the user has selected to filter on.
- Create a new parameter of the type ‘string’ and save it
- The next step is to link this to an active filter. Select the filter you wish to link to your parameter or create a new one. In the edit filter pane, change the filter type to customer filter.
- Tick the ‘Use parameter box’ and select the parameter you just created from the dropdown. Click apply.
- The parameter and filter are now linked, but you need to add the parameter to the sheet as a control, not the filter. Navigate to the parameter’s menu and in the ellipses next to your parameter click ‘Add control’
- In the add control menu change the style to a dropdown. You now need to link the value to a dataset field. This is so users can select a name from the existing data. Select the dataset and field needed. Once you click add you will see the control is now pinned to the top of the dashboard
- To use this with the title of your visual, simply use the ‘format visual’ pencil icon at the visualisation and go to ‘edit title.’ You will now see your parameter as an option on the right of the text editor window. You can simply click to add it to your text box.
Summary
Here we’ve shown how parameters are used in QuickSight, and how to create one. If you found this blog useful, or you are interested in knowing more about QuickSight, you may want to check out our previous blogs.